Monday, December 29, 2008

Cauliflower, it's your time to shine!

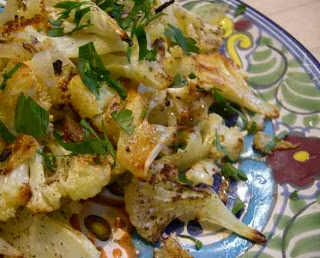
I probably shouldn't post this recipe as it hardly qualifies for a "recipe"; however, it proves how easy one can prepare a delicious side dish. Roasting vegetables is the best way to bring out great flavor and aroma from a boring, blah vegetable (check out these Brussel Sprouts!). Make sure to use vegetables that are in season. This dish is very adaptable to any vegetables you may have on hand. My trick is to top it off with some fresh herbs. This time around, I used parsley from my mom's herb garden, but you could also use thyme, cilantro, or perhaps basil. Give your cauliflower florets a roast next time you have the chance! You're sure to become a proud, roasted veggie addict like myself...

Roasted Cauliflower
1 head of cauliflower
1/2 large Maui onion
1/4 cup olive oil
Coarse sea salt & freshly cracked pepper to taste
Chopped herb of choice

Preheat oven to 400F

Slice Cauliflower and onion into 1/4 inch pieces. Toss in a bowl with olive oil and season with salt and pepper. Spread on to a parchment lined roasting sheet and roast on the top oven rack for about 25 minutes, or until tender and golden brown (You could even sneak some Parmesan cheese on these after about 15 minutes of roasting). Plate on a colorful platter and sprinkle with your herb of choice.

Wednesday, December 24, 2008

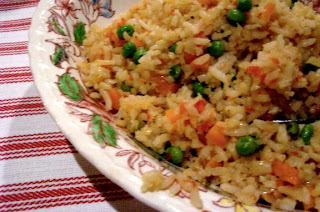
Arroz del Jose'

This rice is my ultimate favorite. Jose has definitely perfected it, I'm still trying...
MexRice
1 cup Rice
3 tbsp oil of choice
1 large tomato
1 clove garlic
1 tsp Oregano
2 cups Water
1 tsp Chicken Bouillon
1/2 cup Fresh Carrots
1/2 cup Peas

In a large fry pan, begin browning the rice in the oil. Using a blender, combine the tomato, garlic and oregano. Slowly pour in the 2 cups of water. Blend for about 4 minutes, until well combined.

Once the rice is nice and brown, pour in the tomato, water mixture and stir in the chicken bouillon. Add the fresh veggies and turn heat down to low. Cover with foil and let simmer. Total cooking time is about 40 minutes. Enjoy!

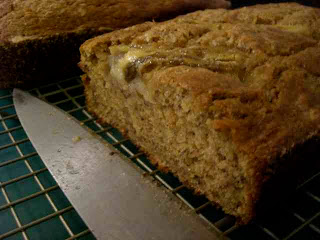
Banana Bread, Take 1

Last week was definitely an adventure. My knee surgery was scheduled to take place Tuesday morning at 7AM, but due to a minor cold that hadn't subsided, the anesthesiologist decided to call it off. What a day. My parent's drove up the night before from Ventura and had planned to take me back home for recovery. One good thing from that day was that my mom always comes prepared. The false alarm left me with homemade chili, free cereal, apples and lettuce for salad from Ventura's farmer's market, I couldn't complain... until, I realized they left their bananas. Now, I have nothing against plain bananas. It's just that my like for them is seasonal, unpredictable, and inconsistent. Lets just say, I needed to get rid of them, fast.

Plain bananas make me cringe, but I do love banana bread. There are many approaches to take with banana bread: tropical, rustic, nutritional, just to name a few. I like my banana bread dense and not too sweet. I also love a defined banana flavor that rides the palette with each bite. Below is a quick recipe I threw together that came out of the oven just perfect. The flax seed and whole wheat pastry flour help create the density that I was looking for while contributing some healthy fiber. Also, using both a dark brown sugar and a white sugar brings out a richness to the bread, while the plain yogurt and almond milk help maintain its moisture. You could easily use regular milk, white sugar and regular flour for a lighter version.

Breakfast Banana Bread
1/2 cup Dark Brown Sugar
1/2 cup Sugar
1/4 cup Butter Unsalted
3-4 large ripe bananas, smashed together in a bowl
1/4 cup Almond Milk
1/4 cup plain yogurt (I prefer low fat - adds to the richness vs. a non fat yogurt)
2 large eggs
1 3/4 cups Whole Wheat Pastry Flour
1/4 cup Ground Flax Seed
1 tsp Baking Soda
1/2 tsp Fine Sea Salt
1/4 cup Raw Turbinado Sugar
1 Reserve Banana, just in case

Preheat oven to 350F
Grease 2 Loaf Pans, and sprinkle with whole wheat pastry flour. In a mixer, combine the sugars and butter on high. Slowly add the mashed bananas, almond milk, plain yogurt and eggs. Turn off mixer once combined.

In a separate bowl, combine the whole wheat pastry flour, ground flax seed, baking soda and salt. Next, slowly add the dry ingredients to the wet ingredients. Do not over mix. Once combined, pour into your loaf pans.

Bake for about 45 minutes at 350F. To test if loaves are done, stick a knife or toothpick in the middle of a loaf. If it comes out clean the loaves should be done.

TIP: I like to slice the banana lengthwise in fourths, and place on top of the batter. Next, I sprinkle a couple tablespoons of raw turbinado sugar over the raw banana and batter. Both the banana and sugar add gourmet touch to the loaf, and a nice sweetness to the crust.

Saturday, December 20, 2008

Just a Post

Since emerging from Stanford undergrad and shoved into the real world, I always found great release from my day job while cooking in my kitchen. This included prepping lunches for the weekdays as well as cooking dinner on weeknights. Going out to eat was fun but also a chore during the work week. If I had a choice, I chose to cook. Not until moving to San Francisco did I realized that I always cooked. Get home late from work? Cooking was easier than trying to find a place to order out. Brunch on the weekend? I’d rather make my own pancakes and eggs, they always tasted better.

The kitchen is where I experiment with flavors, aromas and colors. It’s an opportunity to unwind and be myself. However, the ups have their downs. This little hobby of mine at times gets expensive. Shopping at Whole Foods doesn’t work anymore when you are paying out of your you know what for rent, on top of silly bills. Oh those silly bills… My solution has become my motto - simplicity. Simple ingredients & simple steps with a twist thrown in here and there never seems to fail.

Through this blog I hope to pass along some helpful tips from my kitchen to yours. Because supporting yourself when you have good taste gets tough, especially for the working girl ;-)
**This is Miss Kitty, my fav Bun

Tuesday, December 16, 2008

Gluten Free Can be Delicious & Easy

My list of gluten free friends is growing but my savings account has been shrinking... it's the holidays of course! This quick peanut butter cookie recipe just had to be my next post. For those of you that cringe at just the thought of anything "insert here" - free, I have to tell you, Delicious can sit next to Gluten Free. It does so quite elegantly next to these gluten free peanut butter cookies. For anyone with not much time on their hands, with not much experience in cooking or with an empty fridge and one jar of peanut butter laying around (me), this is the recipe for you. Lets get cooking!

Quick & Easy, Peanut Butter Cookies

1 cup Peanut Butter ( I used Organic, creamy PB )
1/2 cup light brown sugar
1/2 cup white sugar
1 egg

Preheat oven to 350F
In a bowl, combine all ingredients with a spoon. Make sure PB is near room temperature, otherwise you are in for a good workout. Once combined, with your hands roll dough into small balls. Place on a greased baking sheet and press down with a fork to create the chic peanut butter four square logo. Bake in the oven for 8-10 minutes and let cool for another 10-15 minutes. Grab a glass of milk and dig in!

Side Note: At around 7 minutes, I sprinkled some turbinado cane sugar on top of my baking cookies to give them a little sparkle and crunch

Thanks for this awesome recipe Carrie!

Wednesday, December 10, 2008

Julia's Biscottis, My Way.

Every holiday season I bake something for my friends. This year I was blessed with a biscotti recipe from the book Baking with Julia, Julia Childs that is. Of course I can never follow the exact directions, but her recipe for biscotti dough makes an amazing foundation for my Macadamia Nut Biscottis... dipped in chocolate.

A biscotti is a twice baked cookie. Always remember, the crunchier the better coffee dipper. Once you have a good dough on your hands, it's fun to experiment with flavor combinations. Nuts and dried fruit are always great contenders. This time around I used macadamia nuts and coconut milk. Since it is beyond freezing in San Francisco, I was hoping these cookies would take my friends to a tropical island... right? Maybe not. If you don't like coconut, you can always substitute it with vanilla and/or a liqueur. Either way, give these a shot, they're sure to please the masses.

Macadamia Nut Biscottis
Dough
1 2/3 cups all purpose flour
1/2 tsp baking soda
1/4 tsp fine sea salt
2 large organic eggs
3 tsp coconut milk (canned is best)
{Julia's recipe calls for 2 tsp liqueur and 1 tsp vanilla extract}
3/4 cup sugar

Additions
2 cups roughly chopped roasted macadamia nuts
2 1/3 cups semi sweet Chocolate Chips (I actually prefer dark chocolate)
1/3 cup coconut milk
(shredded coconut or macadamia nuts for topping)

Preheat oven 350F
In a medium bowl combine dry ingredients. In a separate bowl whisk together the eggs, coconut milk, and sugar. Don't let the eggs sit too long in the sugar as it can "burn" the yolk. Quickly combine dry and wet ingredients. Add the nuts and continue to mix until very well incorporated. You may have to flour your hands and really get in there, don't be afraid! The dough should get stiff, sticky and hard to stir. If dough is too sticky add some more flour, and vice versa. It should be easy to handle.

Form the dough into a thick log, about 5'' wide, 12'' long, 3'' thick. Place on a baking sheet about and bake for 35 minutes, keep an eye on it as it may cook faster depending on the size of biscotti log you created. Transfer to a cooling rack for at least 15 minutes!

Using a serrated knife, cut into 1/2'' thick slices, cutting diagonally. Lay the biscottis on their side on the baking sheet and bake for another 10-15 minutes. Remove from oven and let cool. I stored mine in the fridge for a day before I dipped them in chocolate. The biscottis themselves will last about a month in an airtight container in the fridge.

For the chocolate dip, create a double boiler by placing a glass bowl over a pan with boiling water - unless you own a double boiler. Stir together the chocolate chips and coconut milk in this bowl until completely melted. The consistency of the chocolate dip should be thick enough that it will completely coat the biscottis. Once melted, have fun dipping your biscottis! You can top them off with shredded coconut or more macadamia nuts. I chose to leave mine plain.

Source: Baking with Julia
Sunday, December 7, 2008

Homemade Chicken Nuggets

The problem with cooking for one is when you buy for five. I'm up to my ears in dill. Dill in my salads, brussel sprouts, and now, chicken! Chicken really bores me, and I know I've hit a low when I've eaten plain chicken for the past 3 days... canned tuna is the lowest. This recipe came to existence as I started cutting up my boneless, skinless chicken breast out of boredom. There had to be a way to make this better!

Chicken Nuggets are so easy to make. Why hadn't I thought of this before? All you need is an egg wash, some flour and herbs for flavoring. You are only limited by your imagination. I chose brown rice flour because it has a crunch; I chose dill, because I had no choice! A little drizzle of olive oil makes the chicken more moist and a tad, deliciously greasy. This dish is also great for my gluten free friends!

Chicken Nuggets with Dill

2 boneless, skinless chicken breasts
1 3/4 cups brown rice flour
1 tbsp coarse sea salt
1 tsp cracked pepper
3 tbsp chopped fresh dill (or 2 tbsp dry dill)
1 egg
3 tbsp water
Olive Oil

Preheat oven to 350F.
Cut your boneless, skinless chicken breast in good sized chunks. Place to the side. In a medium bowl combine the dry ingredients and dill. In a smaller bowl, beat together the egg and water. This is your egg wash. Get your baking sheet out, coat in non stick spray and place next to the two bowls. You are going to create an assembly line. First dip a couple chicken pieces into the egg wash. Let them soak for a couple minutes. Then place the pieces into the Dill and Flour mixture. Pat in the flour mixture so the pieces are fully coated. Lastly, place onto the baking sheet. Continue with all of the chicken pieces. Next, drizzle just a little bit of olive oil over the top of each battered chicken piece.

Bake for 12 minutes on the middle oven rack. With a spatula, flip chicken nuggets over and bake for another 12 minutes. Keep an eye on them. When done, they should be a golden brown. Garnish with some chopped dill and olive oil.

Tuesday, December 2, 2008

Brussel Sprouts, meet Dill

One of my favorite herbs is Dill. With its delicate leaves, distinct taste and aroma, dill can give any roasted, blanched, or stir fried veggie some excitement. One vegetable in particular could really use this boost in confidence ... that veg is the infamous Brussel Sprout. I've come across several roasted brussel sprout recipes but I've decided to add a few of my own twists.

This recipe is very easy. Simply toss ingredients in a bowl, throw onto a parchment lined baking sheet and roast! With so few steps and ingredients, you should really focus on finding the highest quality produce. I recently returned to San Francisco with organic brussel sprouts from the Ventura Farmer's Market, a couple of lemons from the Engel's backyard, and not to mention, a giant stuffed suitcase. Today I picked up some dill along with some motivation to cook in my messy apartment. What better way to procrastinate from unpacking than cooking! I hope this dish will sway the brussel sprout avoider in your life...

Some quick tips... When selecting brussel sprouts, look for the young, small, vibrant green sprouts. Brussel Sprouts already have a peculiar cabbage stink because they contain a lot of sulfur. This stink gets stronger when they're too old or overcooked. Also, if you picked yours from the farmers market, a great way to get rid of any bugs is by soaking the sprouts in salted water and a small amount of vinegar.

Dill Roasted Brussel Sprouts
About 2 1/2 Cups Brussel Sprouts, ends trimmed and sliced in half
3 tbsp Olive Oil
1/2 tsp Water
1/4 tsp Lemon Zest
1/2 tsp Juice of a Lemon
1/2 tsp Coarse Sea Salt
Crack of Black Pepper
2 Tbsp chopped Dill

Preheat oven to 400F
In a bowl combine all ingredients.  Spread onto a lined baking sheet and bake on the lower/middle oven rack for about 25 minutes.  Depending on your brussel sprout size and amount, the cooking time will vary.